
Signatures
Create Signable Template
PDF CreateMate lets you create signable templates, making it easy to add e-signatures to generated documents. This feature is especially useful for contracts, agreements, and other documents that require client signatures.
Signature Placeholders (HTML & Word Templates)
For HTML and Word (.docx) templates, include these placeholders in your template content:
Signature
{{pdf_createmate_signature}}
Signature Date
{{pdf_createmate_signature_date}}
For counterparty (second signer) signatures:
Counterparty Signature
{{pdf_createmate_counterparty_signature}}
Counterparty Signature Date
{{pdf_createmate_counterparty_signature_date}}
Signature Positions (PDF Templates)
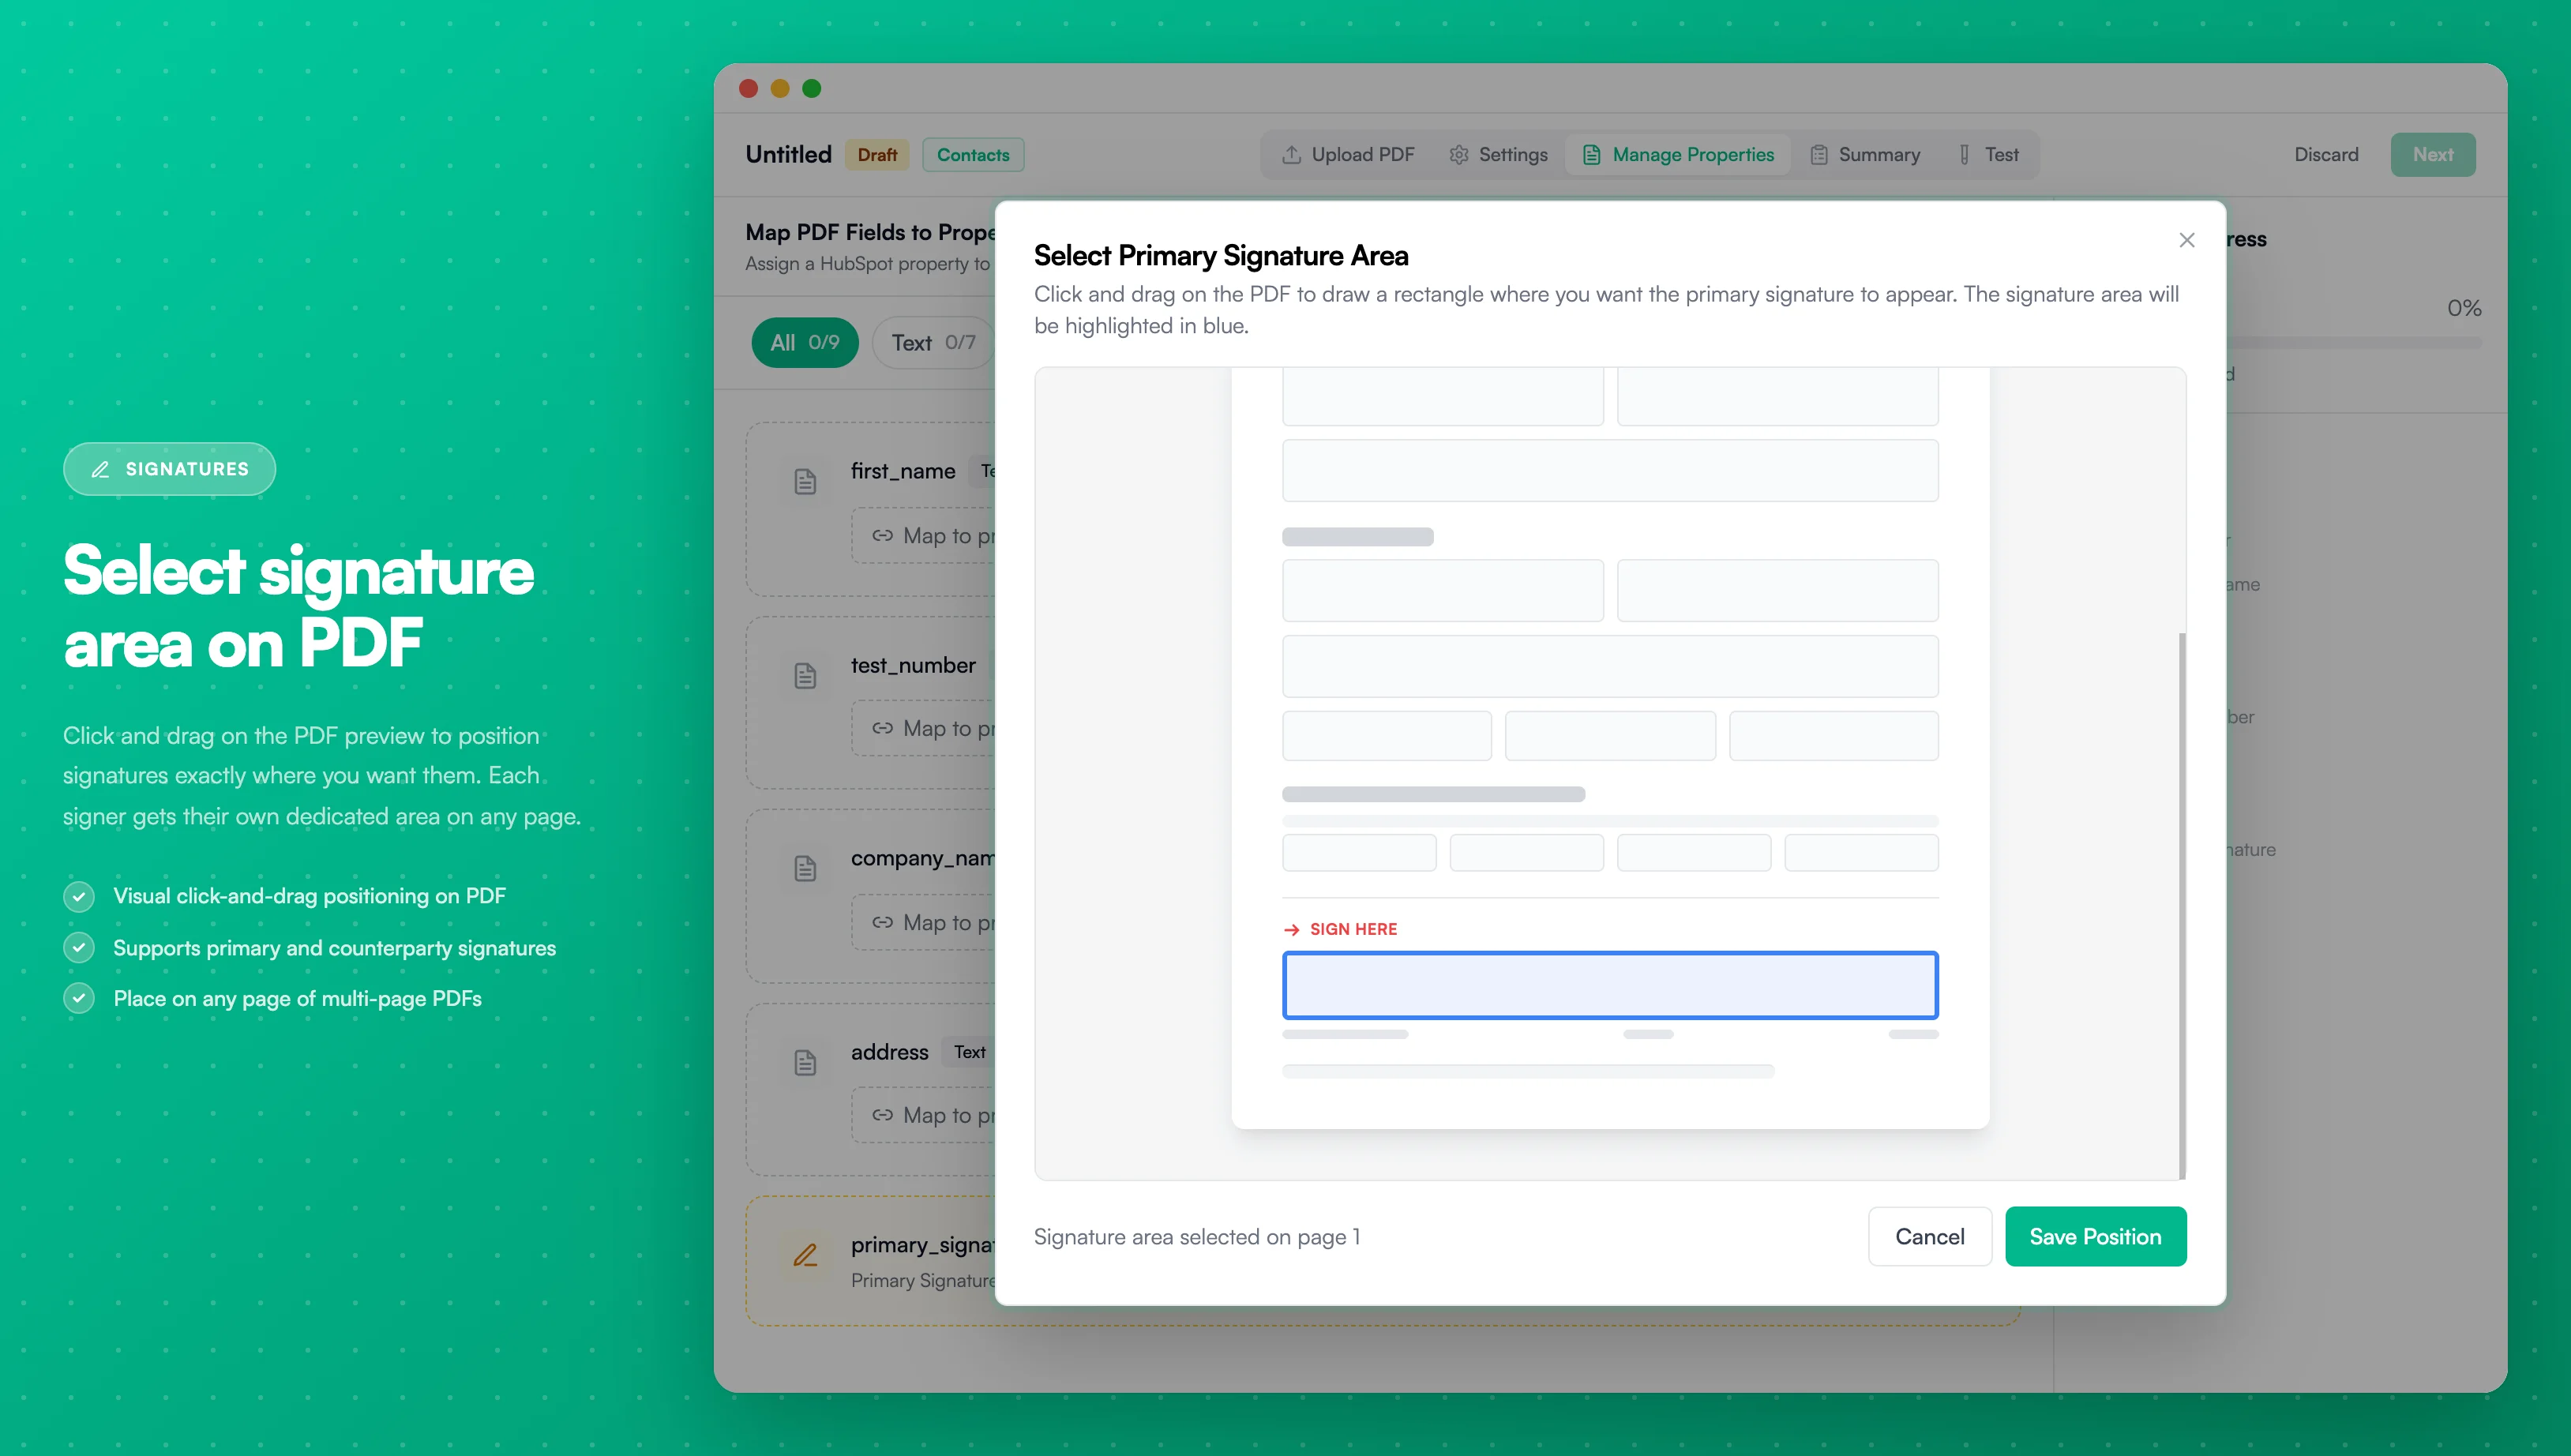
Image description
- A modal overlay on the PDF Forms builder page
- A PDF document preview with a skeleton form layout
- A blue highlighted rectangle marking the selected signature area
- Page navigation controls (previous/next) with current page indicator
- A "Click and drag to select signature area" instruction in the toolbar
- Footer showing "Signature area selected on page 1" with Cancel and Save Position buttons
For PDF templates, signatures are placed using visual position selection instead of placeholders:
- Enable signature feature in template settings
- Navigate to the Manage Properties step during template creation
- Click "Select Primary Signature Area" (or "Select Counterparty Signature Area") to open the interactive PDF preview
- Click and drag on the PDF to select a rectangular area where the signature should appear
- Choose the page where the signature should be placed (for multi-page PDFs)
- Save position to confirm the signature area
Key differences from Word, Google Docs, and HTML templates:
- No placeholders needed in the PDF content
- Signatures are positioned visually on the PDF preview
- Position is stored as coordinates (x, y, width, height, page)
- Signatures are required when enabled (cannot publish template without selecting positions)
Setup Steps
-
Create your template: Follow the steps in Create Template to create your template, including the signature placeholders above.
-
Upload the template: Follow the steps in Upload Template.
-
Enable signature option:
- Check the box labeled 'Enable Signature'
- Set a property to store the signature URL (allows guests to sign without a PDF CreateMate account)
- (Optional) Enable Add counterparty signature for documents requiring two signatures

Image description
- An option to "Enable Signature" for digital document signing
- A "Sign URL Property" field to store the signature URL
- An option to "Enable Counterparty Signature"
- A "Require email verification" option before signing
- A "Thank You Message" field to customize the message shown after signing
-
Personalized Thank You Message: Customize the thank-you message displayed after the document is signed.
-
Credits: Enabling Signature adds 200 credits on top of the 100-credit base (total: 300 credits). Turning on Counterparty signature adds another 100 credits (total: 400 credits including base + single signature). If you enable Email verification, add 15 credits per required signature.
-
When you generate a document, the configured HubSpot property is updated with the signing URL (and counterparty URL if enabled). After signatures are completed, PDF CreateMate creates a HubSpot note with the signature details and attaches the generated document.
Email Verification for Signatures
Enable the "Require email verification" option to add an additional layer of security to your signing process. This feature ensures that only verified email recipients can sign documents.
How It Works
When email verification is enabled:
- Signer enters their email: The signer must provide their email address on the signing page
- OTP code sent: A 6-digit one-time password (OTP) is sent to their email
- Code verification: The signer must enter the code within 10 minutes (maximum 5 attempts)
- Name confirmation: After successful verification, the signer provides their full name
- Sign document: Once verified, they can complete the signing process
When to Use Email Verification
- Compliance requirements: When regulations require verified identity for signatures
- Sensitive documents: Contracts, NDAs, or legal agreements requiring additional security
- High-value transactions: Sales agreements or service contracts with significant financial implications
- Audit trail: When you need verified email records for each signature
Configuration
The email verification option is configured during template setup:
- Check "Require email verification" in the signature settings
- If a HubSpot email property is configured, it will be prefilled and locked for the signer
- Each verified signature adds 15 credits to the document cost
Security Benefits
- Identity verification: Confirms the signer has access to the claimed email address
- Prevents unauthorized signing: Only the intended recipient can sign
- Audit trail: Creates a verified record of who signed and when
- Compliance support: Helps meet regulatory requirements for electronic signatures
Use Cases
- Sales contracts and proposals
- Service agreements and NDAs
- Employment contracts
- Client onboarding forms
- Any document requiring legally-binding signatures