
Document Management
Email Documents
Send personalized documents via HubSpot marketing emails using personalization tokens. This allows you to automatically include the correct document link for each recipient.
Setup Steps
- Create or edit a marketing email in HubSpot
- Insert a button element into your email content
- In the Link URL input field, enter the personalization token:
{{ personalization_token('contact.certificate','') }}
Understanding the Token
| Part | Description |
|---|---|
contact |
The object type (Contact, Company, Deal, or Ticket). Change this based on your use case. |
certificate |
The internal name of the file property where documents are stored. Replace with your actual property name. |
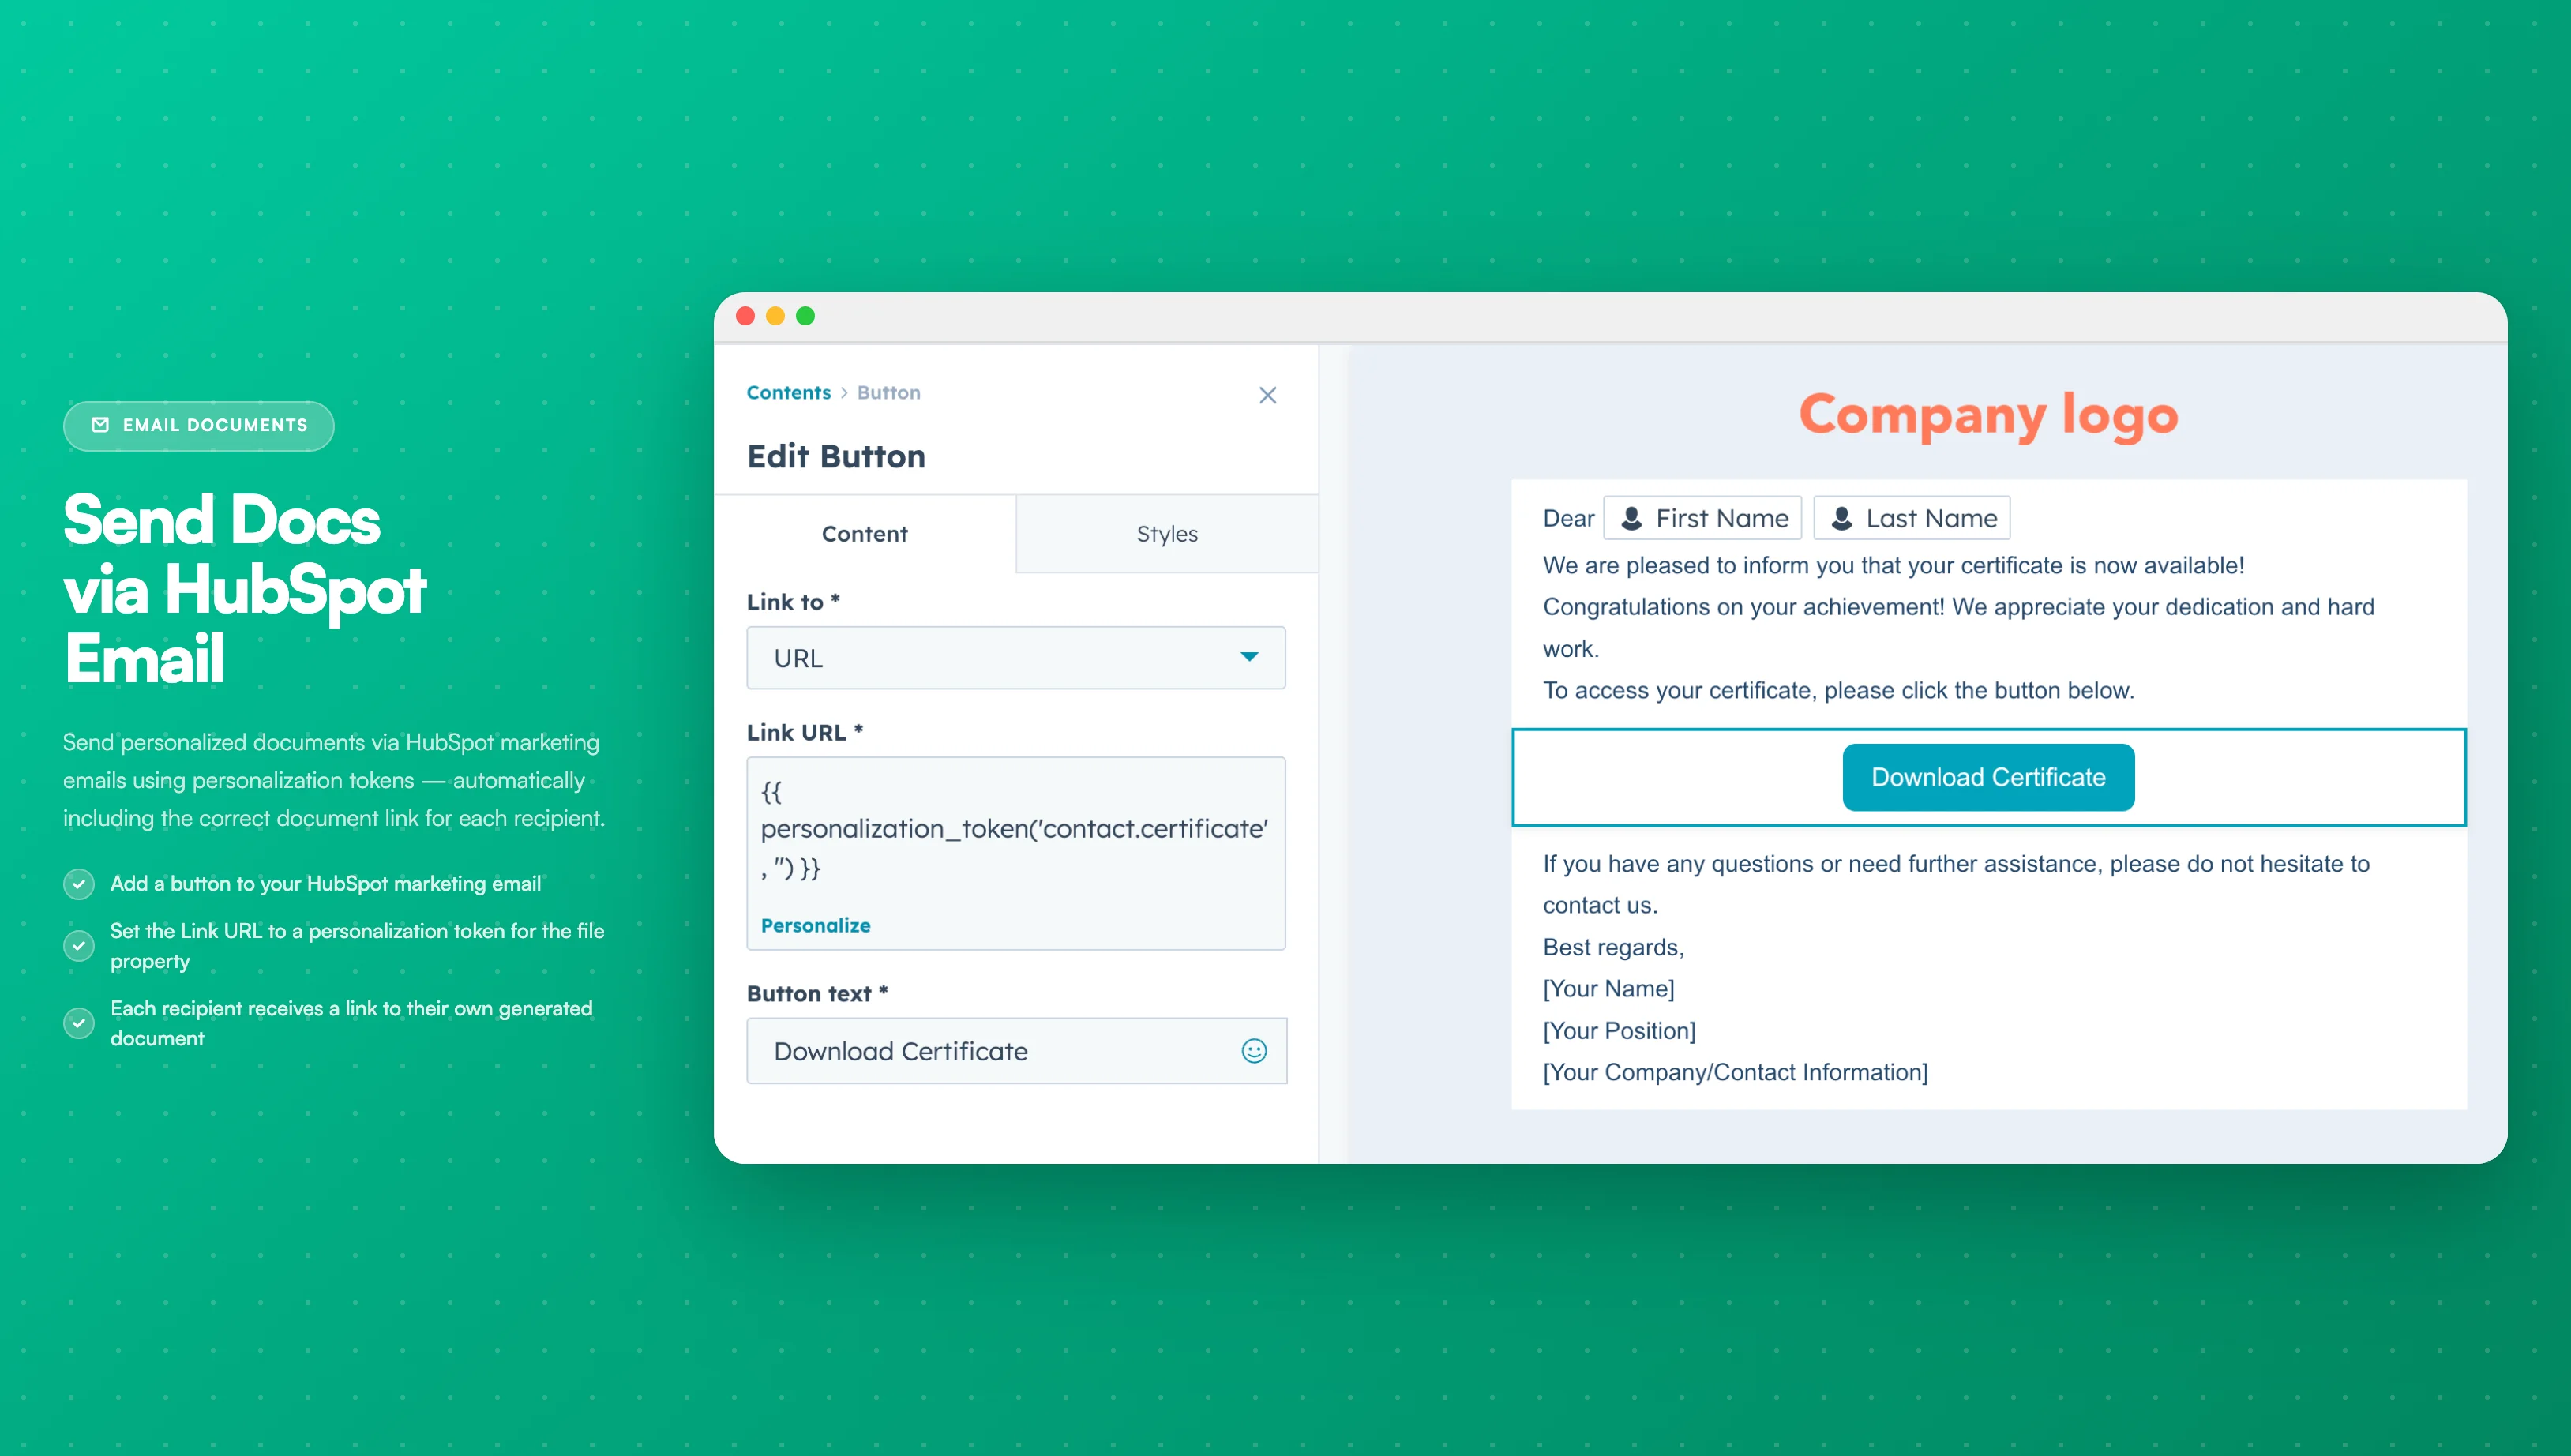
Image description
The HubSpot email editor shows:
- A button element selected in the email template
- The Link URL field containing the personalization token
- The button text (e.g., "Download Your Document")
- The email preview showing the personalized button
- A button element selected in the email template
- The Link URL field containing the personalization token
- The button text (e.g., "Download Your Document")
- The email preview showing the personalized button
Example Tokens
| Object Type | Example Token |
|---|---|
| Contact | {{ personalization_token('contact.proposal_pdf','') }} |
| Company | {{ personalization_token('company.contract_file','') }} |
| Deal | {{ personalization_token('deal.quote_document','') }} |
Best Practices
- Use clear, action-oriented button text (e.g., "Download Your Proposal")
- Test the email with a real contact to verify the link works
- Ensure documents are generated before sending emails
- Consider adding fallback text for contacts without documents
- If the template is configured to append files, the token will include a semicolon-separated list; HubSpot will render the full string. Use a dedicated single-file property if you need only the latest link.
The personalization token will be empty if no document has been generated for that contact. Consider using conditional logic to hide the button when no document exists.